VerifyIQ User Guide
Introduction
The VerifyIQ user interface (UI) offers the ability to view and interact with applications in the Informed platform through a secure user interface, while also making it possible for authorized users to manually complete any remaining verification tasks and enabling them to easily request additional documents from applicants if needed. The VerifyIQ UI is the place where certain users will be able to access the Informed Insights Dashboard in order to review the performance of the platform.
The following documentation enables your team to understand the usage of VerifyIQ and its capabilities. This documentation also guides your IT department through setting up the appropriate safeguards to ensure that verifications and applicant documents are only accessible to authorized users in accordance with your organization's existing need-to-know policies.
Audience
The VerifyIQ application viewer is intended for underwriters, loan officers, funders and managers to be able to view all the details and documents related to a given application within Informed.
The Insights Dashboard available via VerifyIQ is intended for managers, team leads, data teams and IT/project team members to monitor the performance of the platform and view data related to extractions and verifications.
Access
The VerifyIQ UI is currently available as an external web app hosted by Informed. To get started, your IT department or their affiliate should contact your Informed representative to begin the process of getting access to and setting up VerifyIQ.
While the VerifyIQ UI should work in any modern, standards-compliant browser, the recommended browser for best user experience is the Google Chrome browser.
The VerifyIQ SDK, which will allow you to embed portions of the VerifyIQ UI in your Loan Origination System or portal, is now available and is described in the SDK Integration guide.
Security
The VerifyIQ UI relies on Single Sign On (SAML-based) authentication in order to enforce access controls for your organization's data and limit access to designated individuals that your IT department specifies have a need-to-know. This requires Informed to be configured as a Service Provider (SP) within your organization's SSO identity provider (IdP).
Configured within the SSO/SAML integration are Role-Based Access Controls that can limit what specific users are able to do within the VerifyIQ platform. The platform currently supports the following roles: viewer, underwriter, loan officer and manager. Additional details on setup of SAML and these roles can be found in the SAML Setup guide.
The first time the VerifyIQ UI is loaded and rendered on the screen, your users will be prompted to login which will redirect the user to your organization's login screen, according to the SSO protocol. Once authenticated, the user will be redirected to the VerifyIQ UI where the requested application will be rendered.
In the event that your user is already authenticated with your corporate identity provider, the login screen will automatically redirect to the VerifyIQ UI and establish an authenticated session for the authorized user.
Application Viewer
VerifyIQ offers users the ability to easily see all of the requested verifications, classified documents and verification data for a given application. Users are additionally able to upload documents to an application from their computer, as well as able to download or print the documents that are present within the portal.
Upon navigating to the VerifyIQ application, you will see a page similar to the following page -- only it will have your name and logo instead of our Acme test lender.
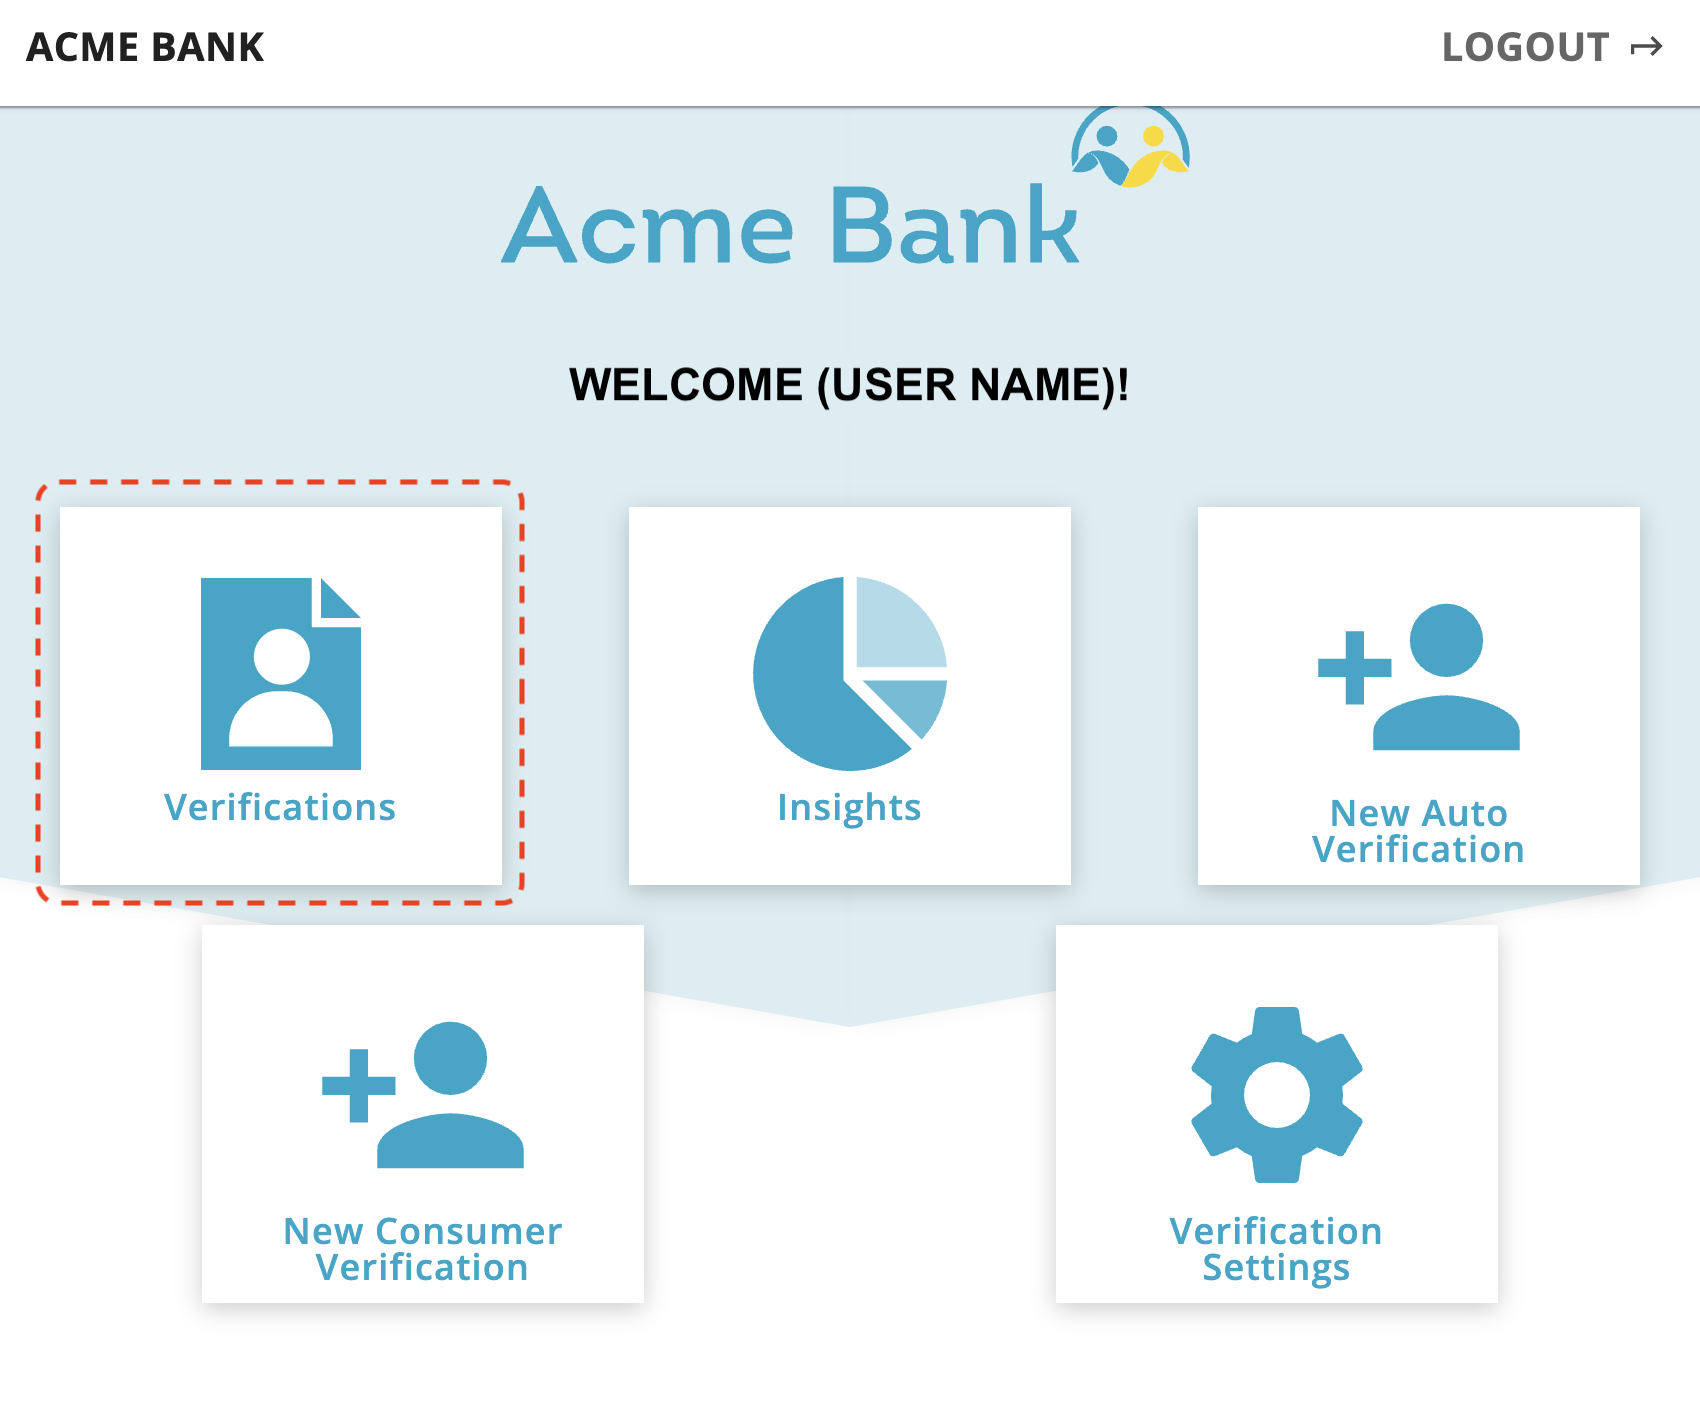
Once a user has logged in per the information above in the security section, they will see a screen similar to the one below. Note that the presence of the Insights button will depend on the role assigned to the user. Not all users will have access to the Insights dashboard.
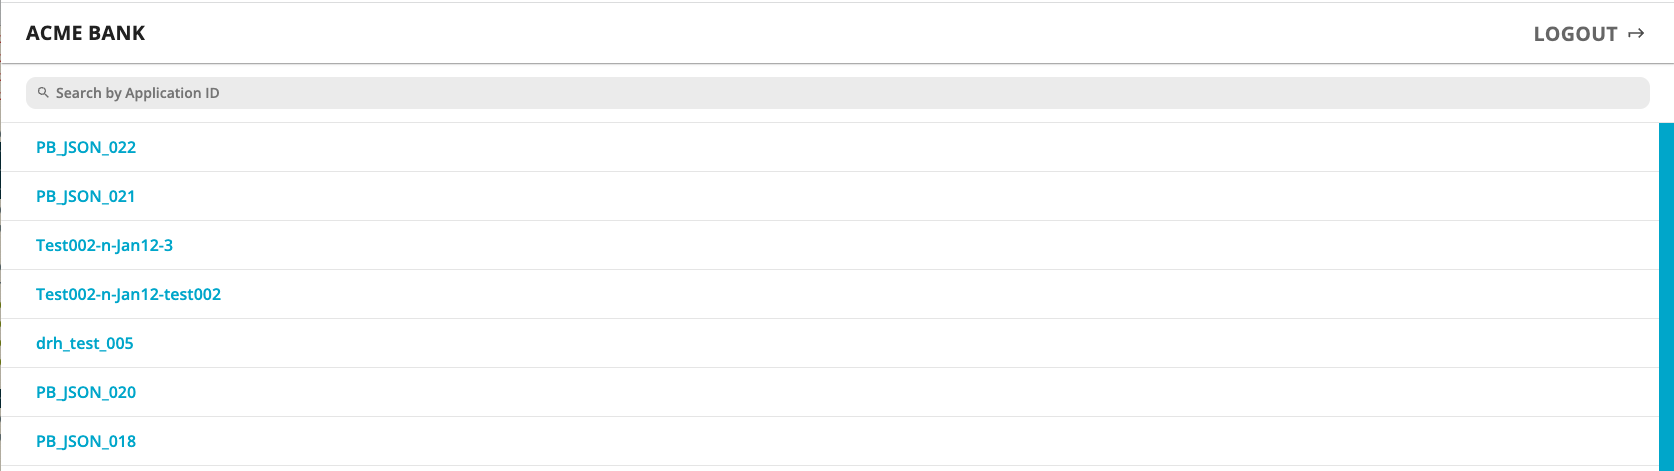
Upon clicking on the Verifications button, you will see a screen similar to the one below. This page provides a list of recent applications that have been processed as well as a search bar.
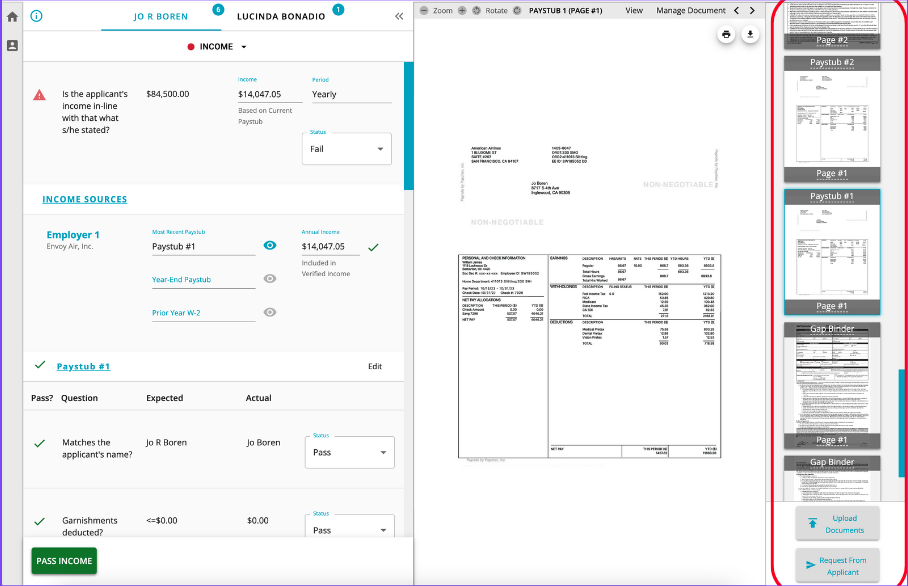
Once you have selected an application from the list by clicking on it or by searching for an existing application reference id, you will be taken to the main VerifyIQ application viewer screen for the selected application. The VerifyIQ application viewer interface is comprised of 3 primary window panes: left, center and right.
Informed has introduced new Queue Management features that can help your funders work more efficiently in VerifyIQ. Please contact your account representative for more information about enabling this new functionality.
Keyboard Shortcuts
VerifyIQ has been enhanced with keyboard shortcut commands to improve operational efficiency for VerifyIQ users.
Application Operations
| Action | Windows | Mac |
|---|---|---|
| Application Information | Alt + A | Option + A |
| Download Verification Report | Alt + P | Option + P |
Document Operations
| Action | Windows | Mac |
|---|---|---|
| View/Edit Document Extractions | Alt + E | Option + E |
| Document Info | Alt + D | Option + D |
| Classify Document | Alt + C | Option + C |
| Ignore Document | Alt + I | Option + I |
* Note: Access to document editing and ignoring documents is configured on a per client basis.
View Actions
| Action | Windows | Mac |
|---|---|---|
| Zoom In on current document page shown | + | + |
| Zoom Out on current document page shown | - | - |
| Show OCR Boxes on documents | Alt + O | Option + O |
| Show Extractions on documents | Alt + B | Option + B |
New Document Collection and Upload
| Action | Windows | Mac |
|---|---|---|
| Upload Document Popup | Alt + U | Option + U |
| Request From Applicant Popup | Alt + R | Option + R |
* Note: Access to the RequestIQ popup modal (and resulting CollectIQ text messaging) is configured on a per client basis.
Document List
The document list in the right hand pane of the interface will show all of the documents that have been uploaded to Informed. These documents are classified and grouped together if they are multi-page documents.
By default the documents are sorted by document type and you can alternatively sort by file upload date. When sorting by document type, if there are multiples of the same document type, the latest upload is sorted first within the group. Partners are able to define a specific order of document types to display within VerifyIQ which can be very useful if your funders are used to reviewing documents in a consistent and specific order.
Add Documents
The "Upload Documents" button allows users to upload documents within VerifyIQ. The "Request from Applicant" button allows users to launch the customer facing white-labeled text message experience to collect Credit Stip documents. This feature is only available if CollectIQ is configured for use within Informed. The CollectIQ workflow is detailed in the Send a CollectIQ Request section.
Document Viewer
The document viewer in the center pane of the interface is where a user can focus on a specific document. They are able to zoom in/out and rotate the images as needed by selecting the toolbar icons in the top left corner of the pane.
Users are also able to print or download documents locally to their computers directly from this window as well.
In this section there are additional dropdown menus available for the additional tools to perform actions on documents, these menus are the "View" and "Manage Document" menus.
Manage Documents
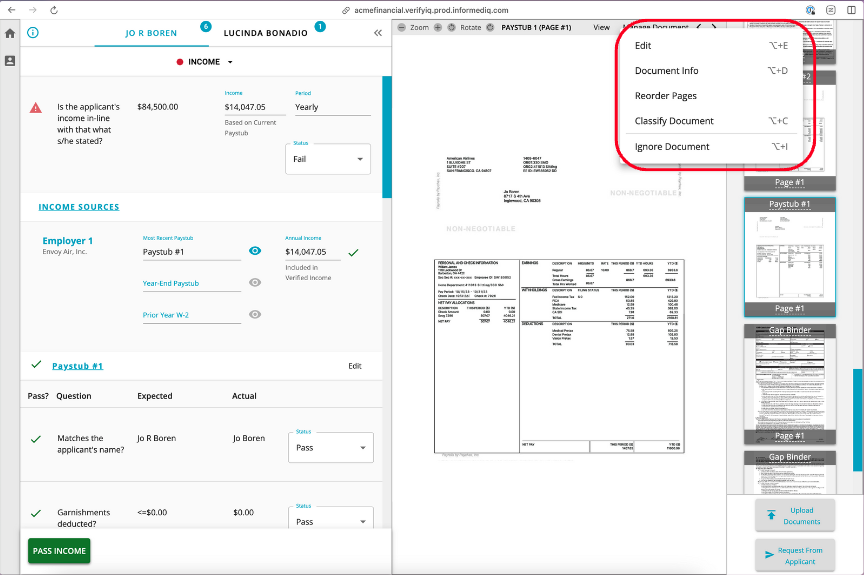
The "Manage Document" button provides users a number of options to interact with a given document.
The "Edit" menu option will launch our HITL interface (see HITL section below for more details).
The "Document Info" menu option provides additional information about a document such as file name and upload time. These details allow users to see when documents were uploaded, the document classificaton, as well as the original file name provided when the document was uploaded to Informed.
Users also have the ability to use the Reorder Pages, Classify Documents and Ignore Document functionality from within this menu. These functionalities will be explored further in the below sections.
Keyboard shortcuts are available to make these actions more easily accessible.
Reorder Pages
The "Reorder Pages" menu option allows a user to change the order of the pages in multi-page documents. This is especially useful for documents such as bank statements where it may have been labeled out of order and you could move the first page from 6 to 1.
This can both help organize the document package and make it cleaner but also can help improve the extractions and validations if a document was out of order.
This action will trigger a callback via the API.
Classify Documents
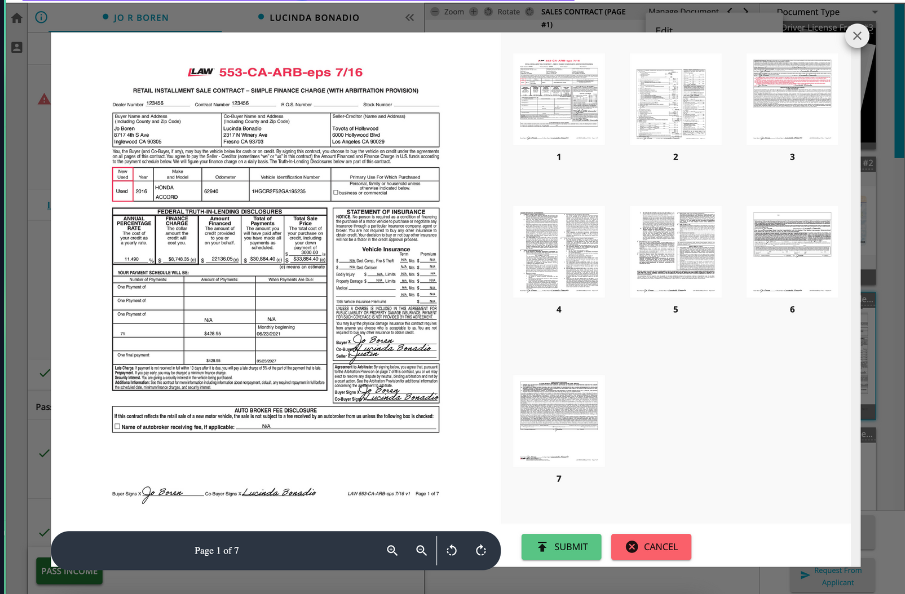
The "Classify Document" menu option allows a user to move through a workflow that will change the classification for a given document.
This allows users to split multiple documents from a given page, classify multi-page documents, pick from a large list of document types and then assign the document to either or both applicants on a given application.
This action will trigger a callback via the API.
Step 1: Are there multiple documents on the same page?

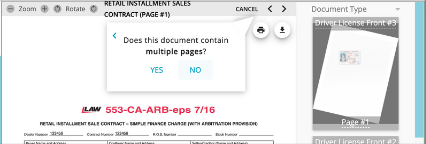
Step 2: Does the document contain multiple pages?
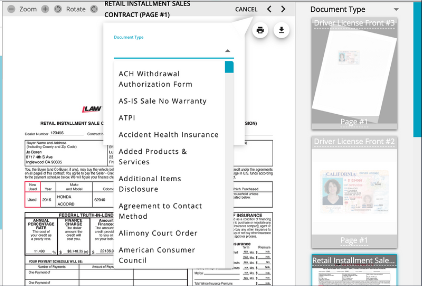
Step 3: Choose the new document classification type.
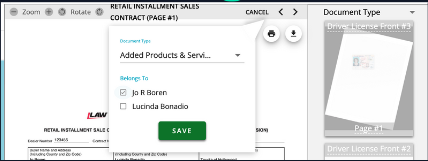
Step 4: Specify which applicant it belongs to and save your changes.
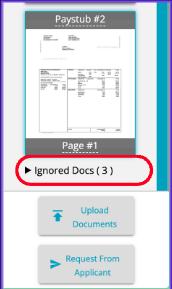
Ignore Documents
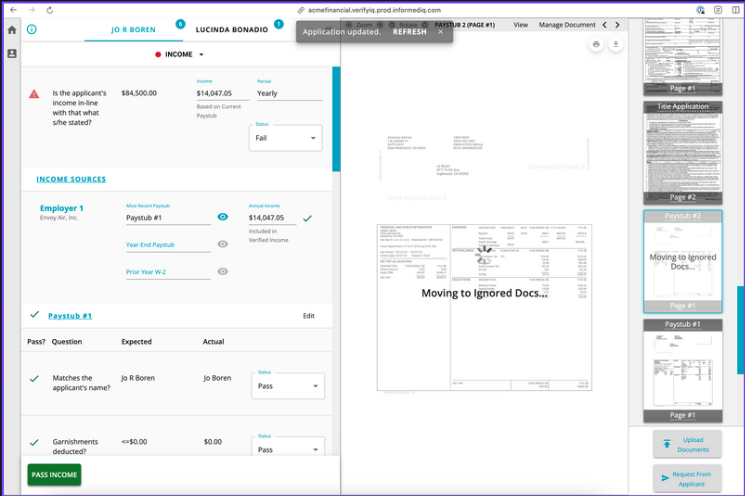
The "Ignore Document" menu option allows a user to move a document into the "Ignored" group which will remove the document from the main list of relevant documents. This can help clean up any duplicate or unncessary documents from the deal jacket. This action can be undone by going to the "Ignored Docs" group and select the document to un-ignore.
Ignoring a document will also remove it from being evaluated for a given stipulation, so it can be useful to ignore any unneeded or duplicate documents that may have been provided to satisfy a stipulation.
This action will trigger a callback via the API.
The number of currently ignored documents is displayed next to the group label.
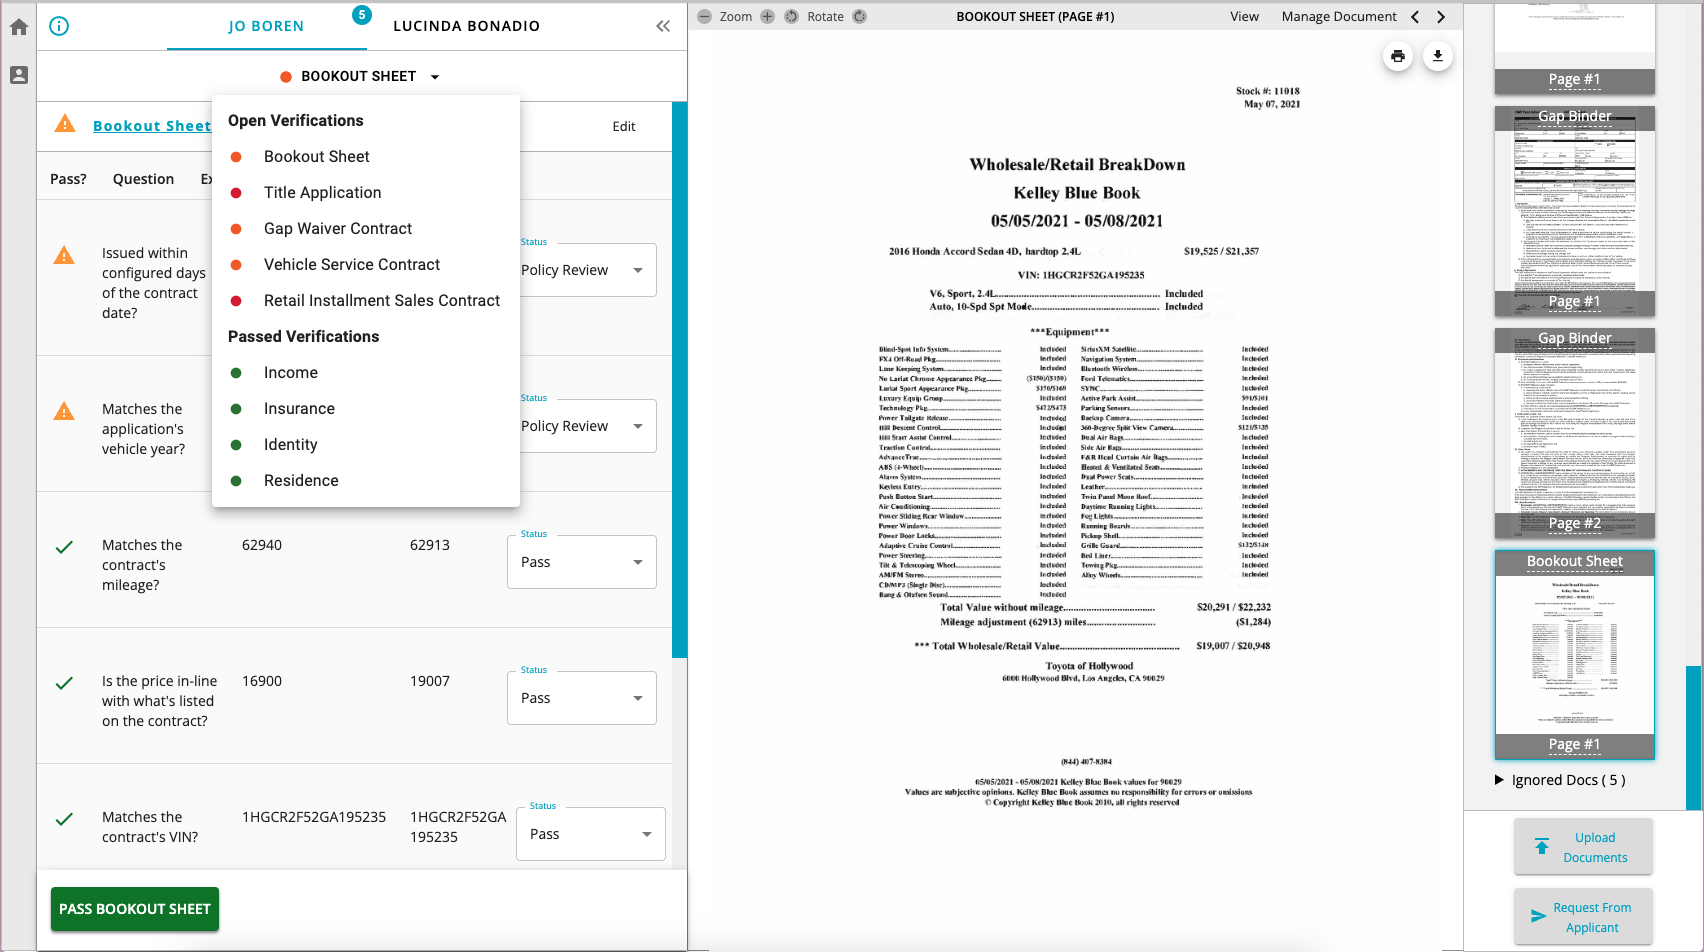
Verifications Panel
The left pane contains the information about the applicant or applicants, as appropriate, along with the list of the verifications (stipulations) registered for this application. You can click on the different applicants and any of the active verifications to show the extraction and verification results based on the document images being shown in the center and right panes. The verifications panel can also be collapsed in order to provide a larger window for viewing documents.
Below is an example of what a user would see when first entering an application analyzed by Informed. If there are any verifications that have not passed completely, the application will open to that applicant's verifications first in order to prioritize the time spent on the areas that require review. The relevant document image used to evaluate a verification will also automatically be selected and displayed when viewing a particular verification.
Starting at the top with the applicant names, each applicant will have a bubble with the number of verifications that need to be reviewed for that application. All applicable verifications can be viewed by selecting the verification dropdown to see the list of open and passed verifications.
In the verifications list drop down, the status of the stipulations are indicated by the color-coded dot.
- Green means "pass"
- Blue means "missing"
- Red means "fail"
- Orange means "review"
Within a given verification, all of the individual verification questions and associated data are shown. For example, in the Bookout Sheet example above, the vehicle information is shown along with the data from the Bookout Sheet that was used to verify that the information matched. The questions that are asked for a given verification are described in the Verification Questions section.
Verifications that have been fully verified will be shown with a green dot next to them in the drop down list underneath the "Passed Verifications" section and they can still be viewed to see which document cleared the verification and what analysis was performed.
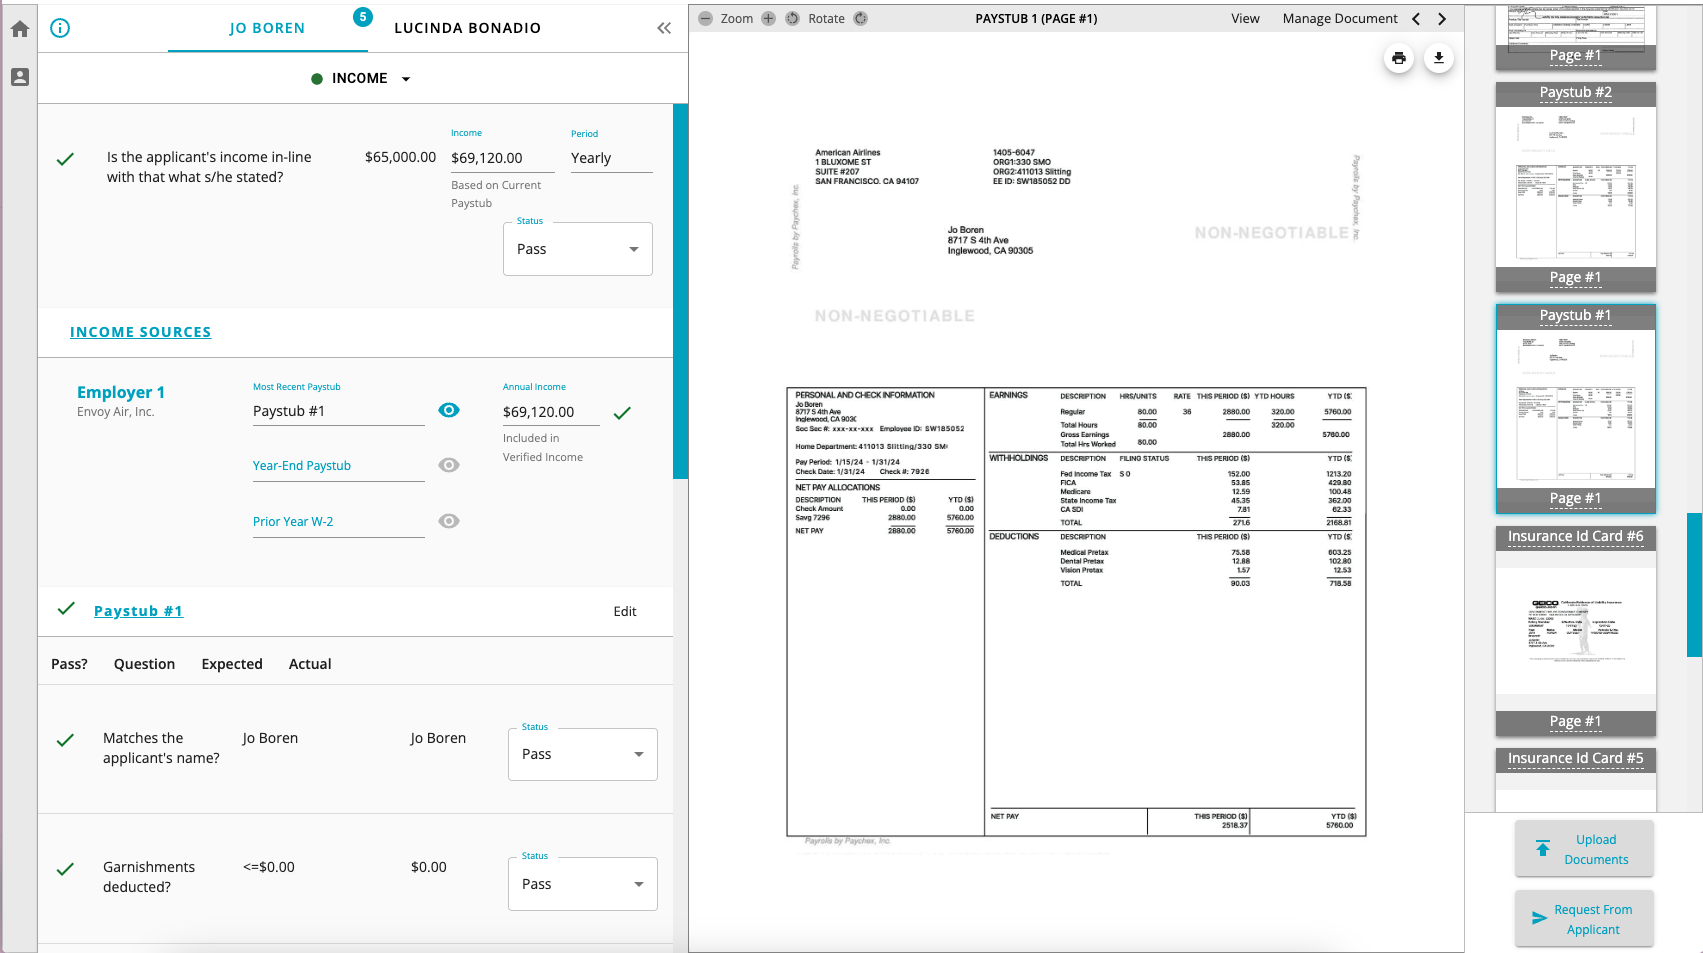
Human in the Loop (HITL)
Sometimes, whether due to poor image quality or orientation, or maybe the format of a particular document is non-standard, all of the desired values will not be able to be extracted from the image, likely impacting the fullness and accuracy of any associated verifications. This situation is where Human in the Loop, or HITL, comes into play.
If you do not see the "Edit" link in your VerifyIQ display, please reach out to your Account Manager.
Also note that even if you only have "viewer" role access, you will still be able to see the edit link and go to that view, but you will not be able to submit any changes to the extracted data.
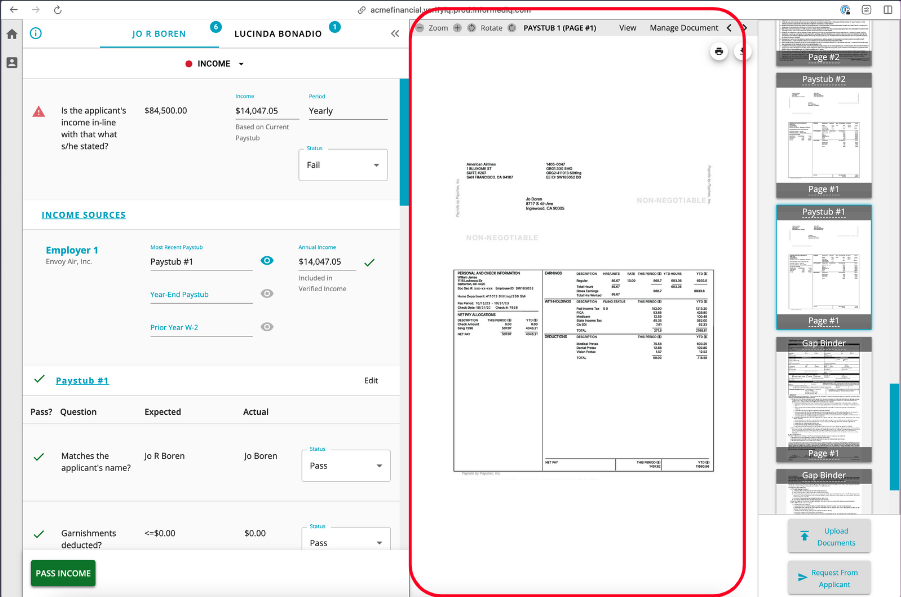
For many of the common document types, there will be an EDIT button in the upper right corner of the left pane next to the document type identifier, like shown in the red rectangle in the screen shot below. Informed will be adding HITL interfaces for an expanding number of document types over the coming months.
Once you click on the "Edit" link, it takes you to the HITL view where you will see the document image and text fields for each of the corresponding fields on the document that are normally extracted. If a stipulation is in review because verification questions required to pass a stip were not extracted, the window will open to the "Fields to Review" tab. This tab is designed to focus specifically on the fields that need to be extracted in order to complete the verification. If a user wants to see all of the potential extracted fields, they can swap to the "All Fields" tab. If a value was extracted, it will be populated in its corresponding field.
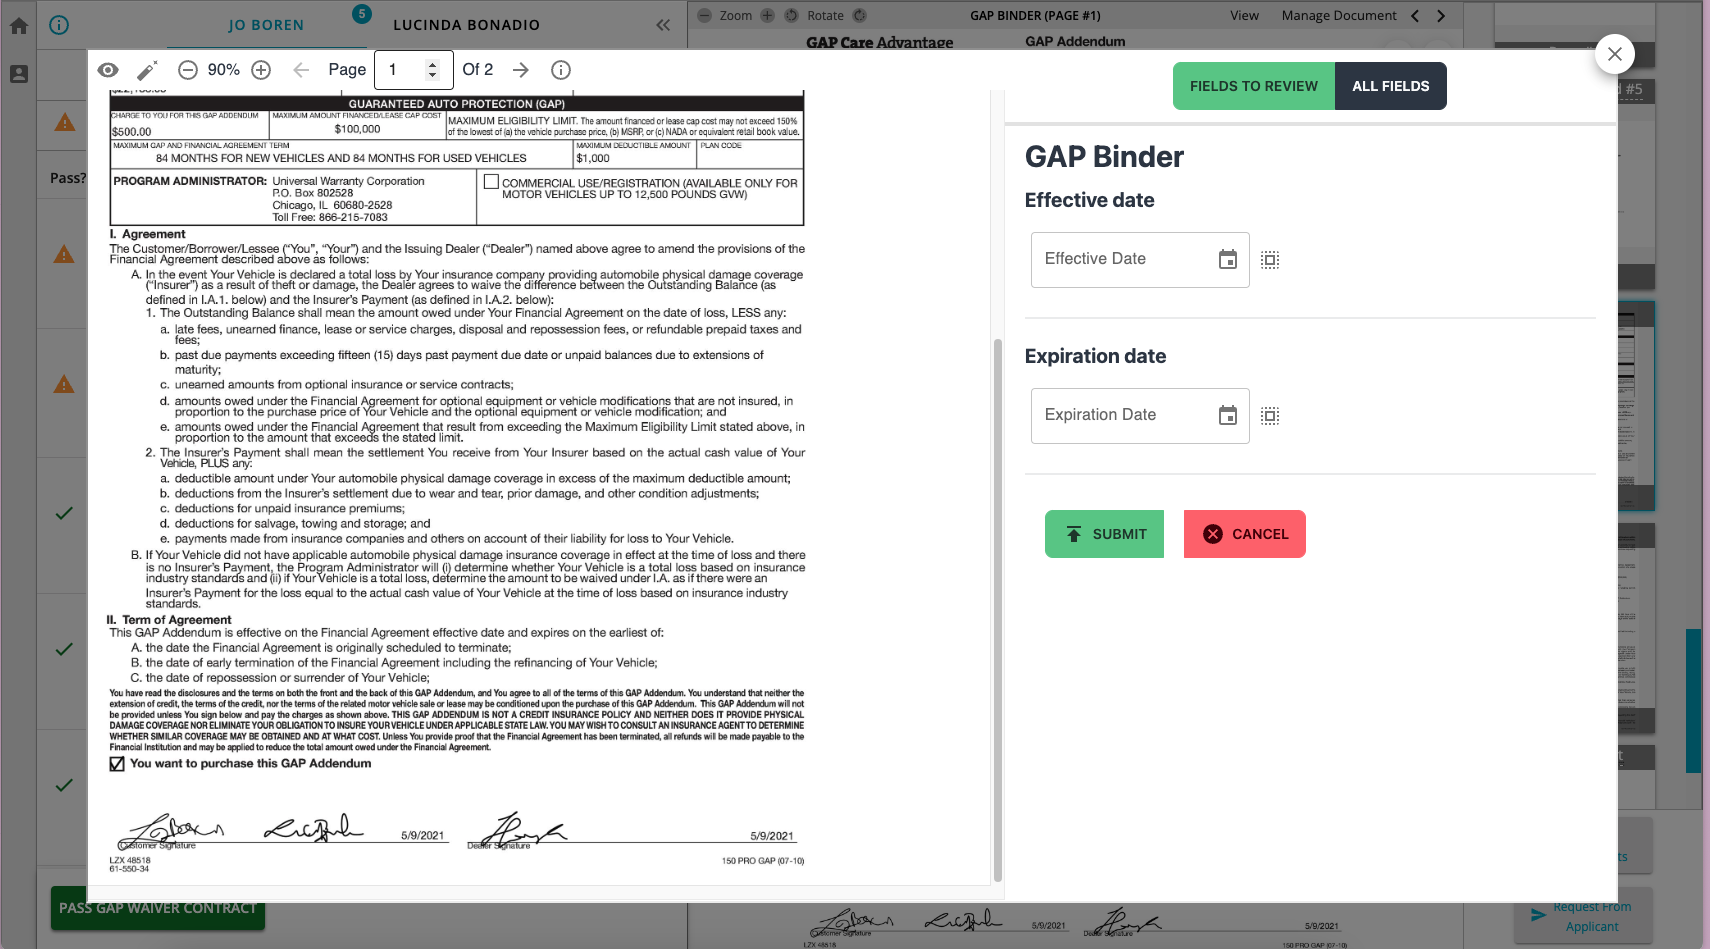
After you enter values for the fields that you desire to update or correct, it will look like this:

Once you are finished making all updates or corrections, click the large green SUBMIT button below the data entry fields to send it back for reprocessing. While it is updating the extractions and verifications, the screen should look similar to this:
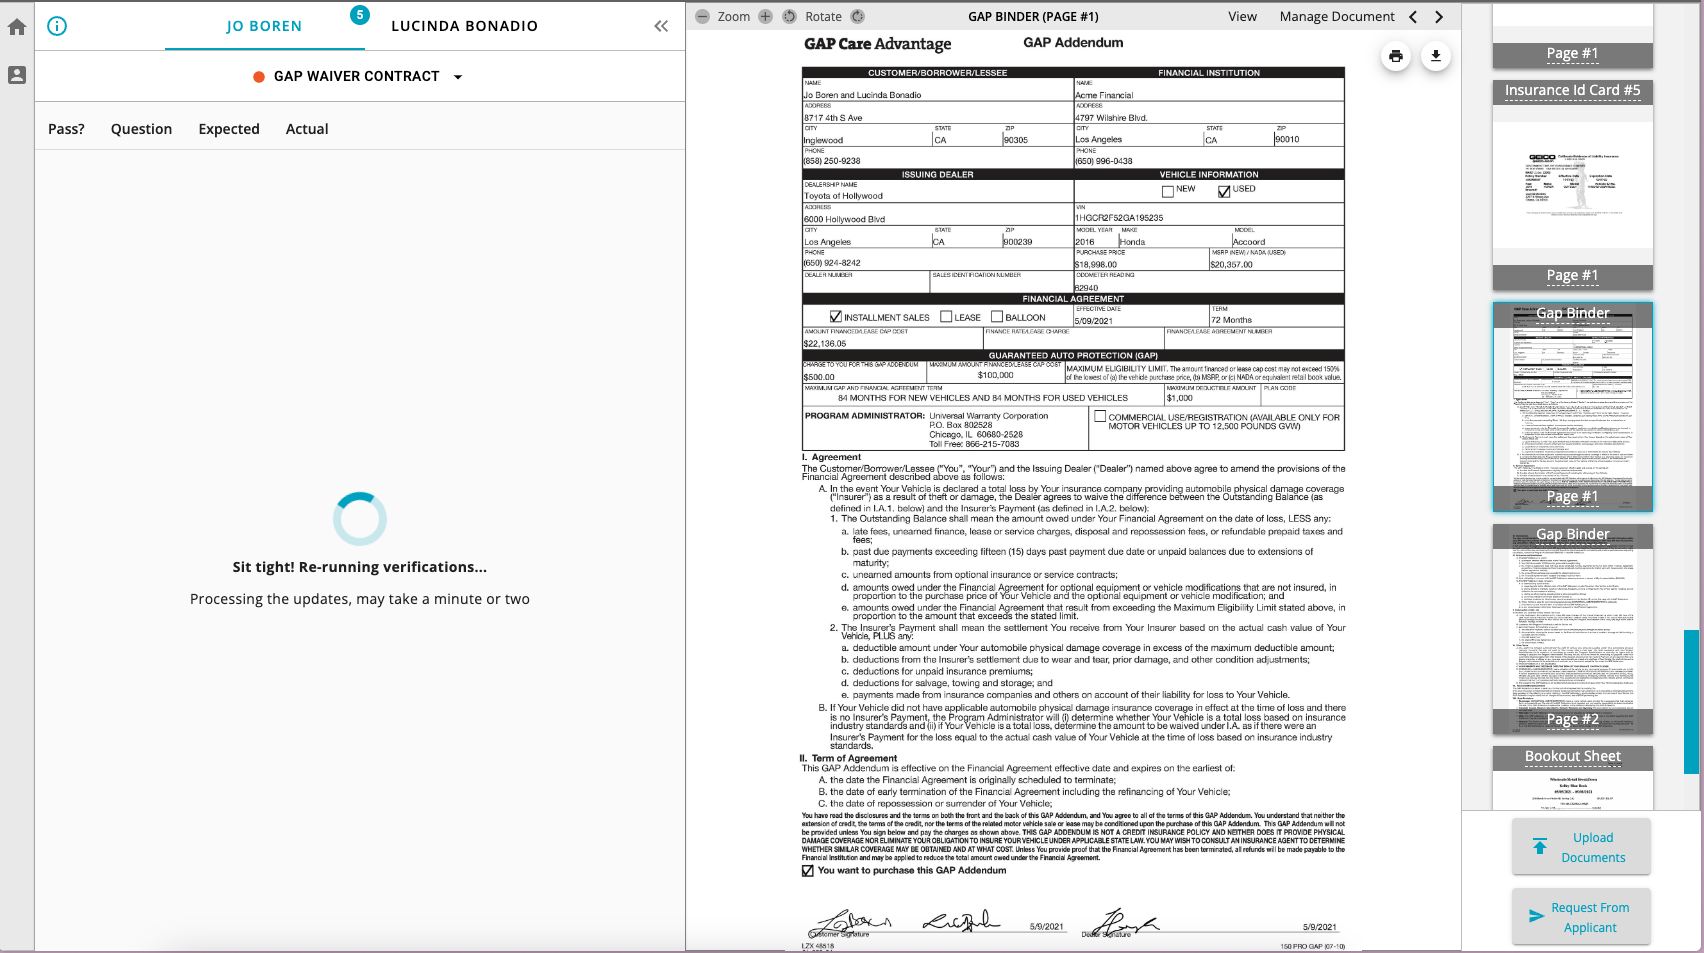
Once it has finished reprocessing, you will be returned to the normal VerifyIQ UI application viewer screen.
Send a CollectIQ Request
RequestIQ is a component within the VerifyIQ user interface that allows users to request specific documents by sending a text message directly to the loan applicant. The typical reason for collecting documents is when required loan documents for credit stipulations (e.g., income, residence, identity and insurance) are missing from the loan package. The document collection process can still be initiated even if relevant documents are present, as there may be scenarios where more recent documents are required or additional documentation is necessary.
Access
The functionality provided by RequestIQ equates to a user interface for the Informed CollectIQ API and as such requires that CollectIQ be enabled for your account. Please contact your Account Manager or Customer Service rep if you have any questions about the status of your account and what services are enabled.
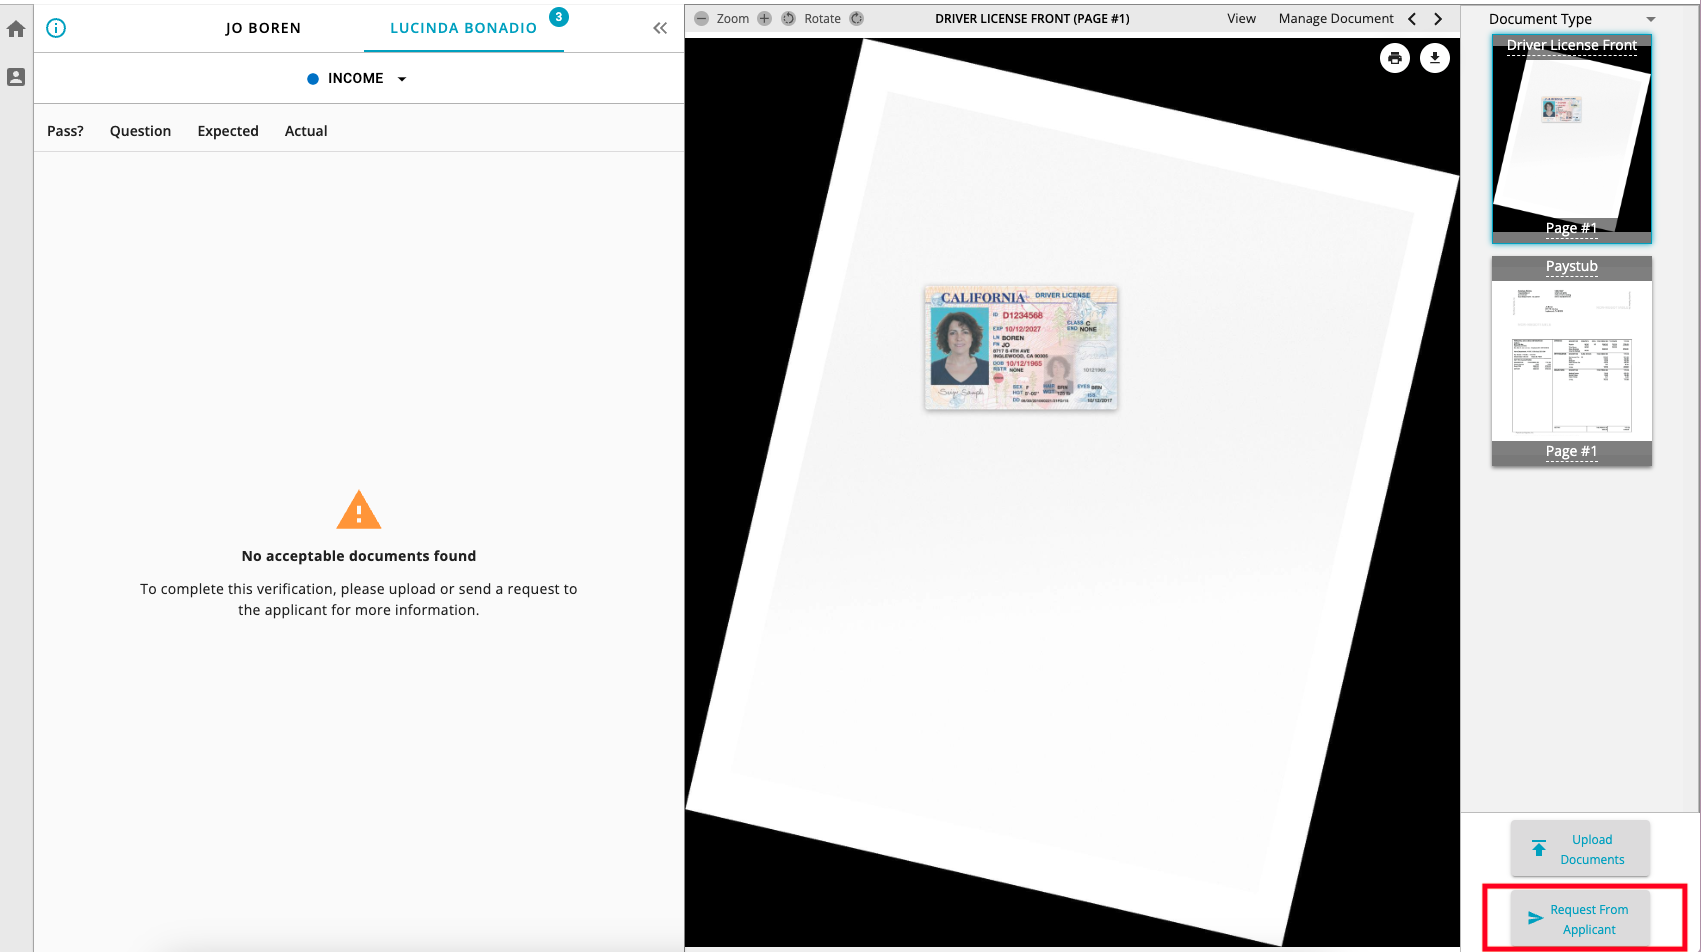
Requesting Documents
VerifyIQ users can initiate the flow to collect documents from customers by selecting the Request From Applicant button in the bottom right corner of the VerifyIQ application viewer screen.
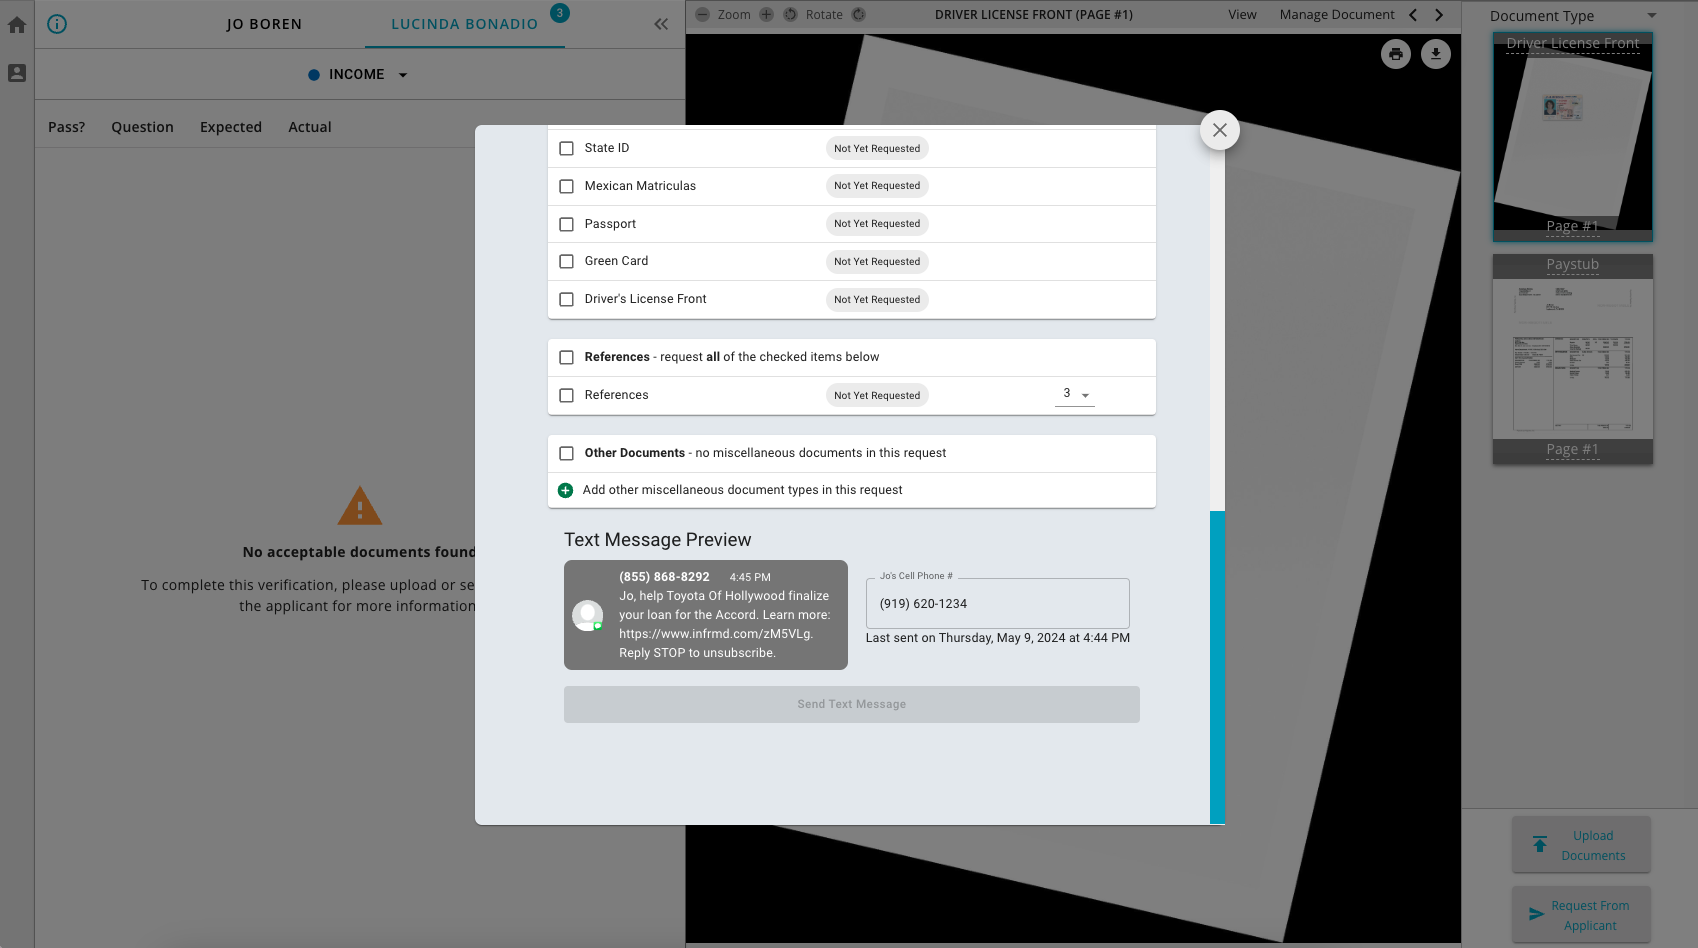
After selecting Request From Applicant, a new modal window will open that will allow the user to select the specific stipulations and relevant documents that the loan applicant needs to provide as part of the loan application.
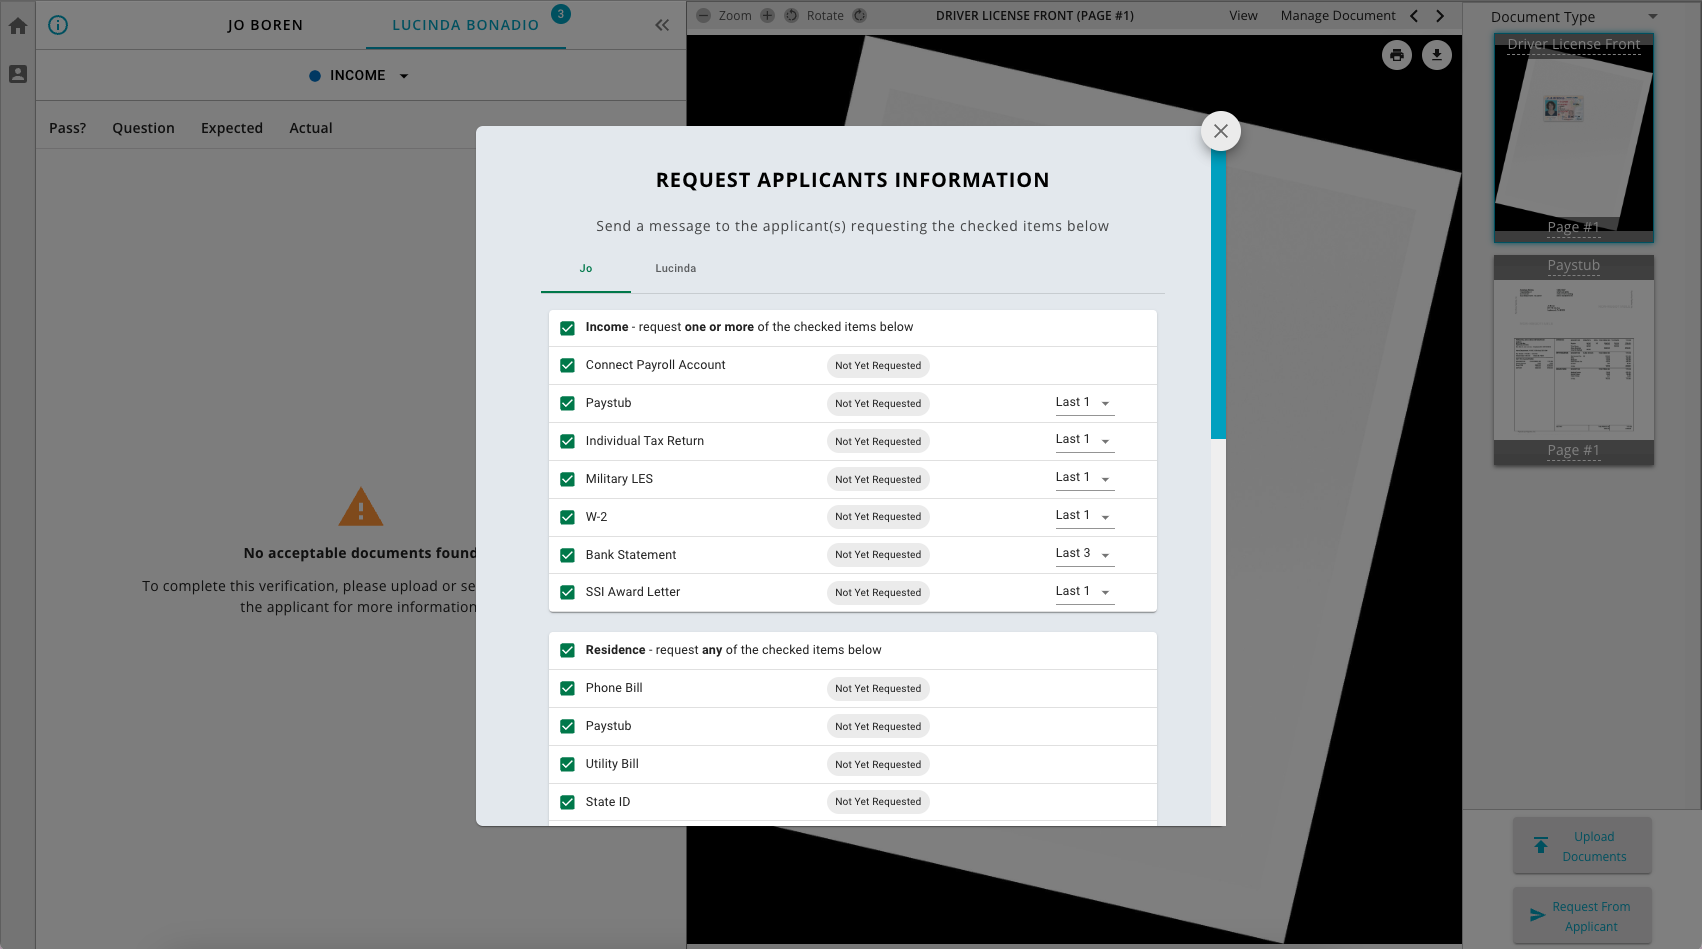
Within this window, users will be able to select the specific stipulations that are relevant for the document collection request as well as the specific documents and quantity that should be provided. Any combination of stipulations and their respective documents can be selected during this process. There is also a place where miscellaneous documents can be entered as part of the request. These documents either do not apply to the specific stipulations or may be a document type from which Informed does not currently classify and extract data.
RequestIQ can be configured with different pre-selection options. The pre-selection options available are as follows:
- all documents for all stipulations will be pre-selected by default
- only documents for open stipulations (stipulations that are not passing) will be pre-selected
- no documents for any stipulations will be pre-selected
This configuration must be completed by Informed, so please contact your Account Manager if you want to adjust the pre-select options.
When the user is ready, they will be able to scroll to the bottom of the window to see a preview of the text message that will be sent and either enter or adjust the desired phone number to send to. If a phone number is provided in the initial registration of the application with Informed, that number will display by default in the window for requesting documents from the applicant.
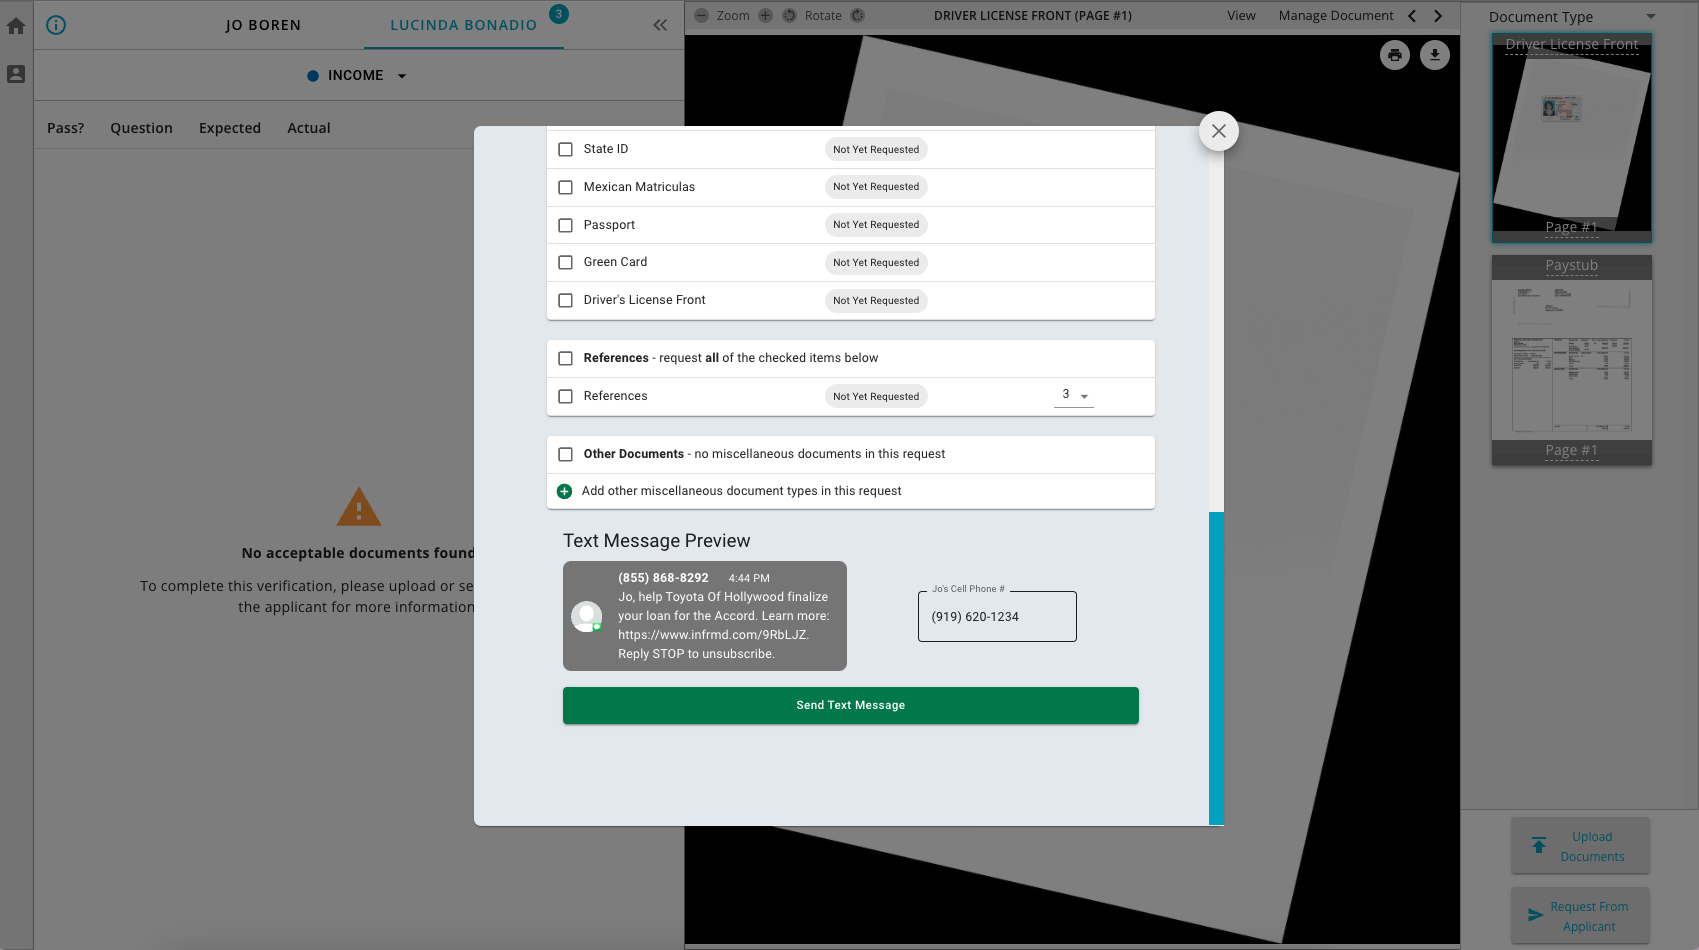
Once the text message is sent, each of the documents that were requested will be updated to indicate their Requested status and the date and time of when the text message was sent will be recorded.